So I'm back in France for the third time this year. We're doing one more development build before we finalize the design and give complete assembly and test control to the factory.
To refresh your memory, I've been working on Hands-Free Bluetooth car kits. It basically turns your car into a giant speaker phone, and all you need is a cell phone enabled with Bluetooth and you're good to go. Since Bluetooth is a wireless standard, no cables are needed. That's the cool part. :-)
I've got a small journal going, and I'll start posting it later. For now, though, I'm going to recaffeeinate myself - the time change in this direction ALWAYS blows.
The best perk of my job is the ability to work from home. I just log in remotely, and I'm connected to email, IM, file servers, etc. Heck, I was up at 2am last night checking email and chatting with a manufacturing guy at the factory in France, and I was able to stroll in at 10:30am this morning with no problems... except the fact that I'm exhausted.
In other news, I'm headed back to France next week. Going back to the factory for yet another build. I'm going to make this trip short and sweet, but I will be flying business class. I'll try to take some pics and relay the experience when I get back.
If you're wondering why I was up until 2am last night, let's just say I was keeping a tradition alive.

I recently replaced the front door and rear deck speakers in my 1998 Toyota Camry LE V6. I figured that since forums and how-to websites helped me get this job done, the least I could do is make my own how-to for others to look at for reference. Enjoy!
**Bandwidth Warning - Lots of pictures**
Note - Comments have been closed. Please PM me on toyotanation.com for more info or help.
This "How To" will go through replacing both the front and rear speakers, then installing new rear coax and front components. It's not necessary to replace both front and back at the same time, so if you only want to replace front or rear then pick and choose which directions you follow.
REAR DECK REMOVAL
The '97-;01 Haynes manual has directions on removing the rear deck for a Camry, but they're only for a Gen 3.5 (1997). The ToyotaNation.com forums helped me figure this one out for a Gen 4.
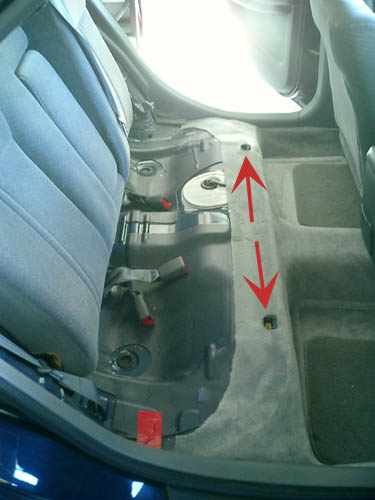
Start by removing the rear seat. There are two tabs toward the front of the seat that hold it in place, so just lift the seat and pull it forward and out. You can see the two receiving snaps on the front ledge of this picture.
Next step is to lower the seat backs and remove the extra padding on either side of the rear seat back. There is a 12 or 14mm bolt on the bottom of the pads that hold them in place. Just remove the bolt, then pull the top of the pad toward you. The pad will release for easy removal.
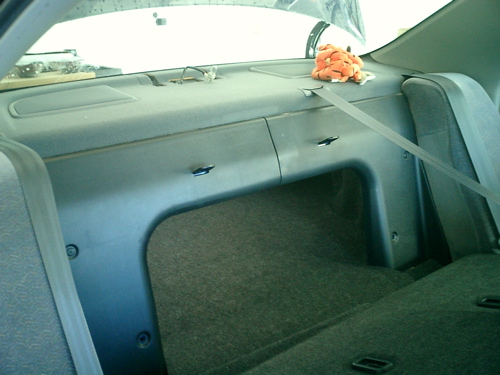
Now remove the rear C-frame trim. This removes just like any other piece of plastic trim in the car, and I think there are about 5 snaps that hold it in place. Just unsnap and then pull forward. An interior panel removal tool is really helpful for snaps on the edge, and you should be able to find this at any car part store.
Now that the padding and trim are removed, now you need to remove the rear deck. First you need to remove the center brake light, which is held by two snaps that are accessible from the trunk. Your owners manual should describe this pretty well, since this is how you replace the bulb. Once the brake assembly is removed, grab the edge of the rear deck closest to you and pull straight. This will disengage snaps close to the window.
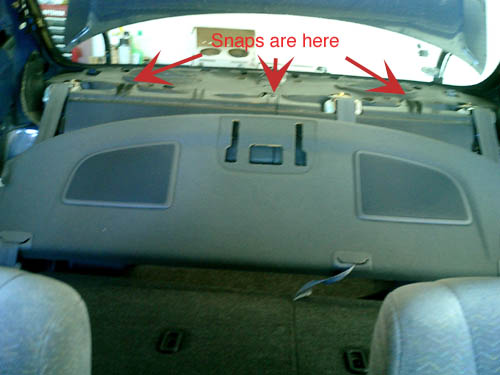
There are three philips-head snaps holding some molding trim pieces that cover the passthrough between the trunk and rear seats. Remove the snaps and molding trim.
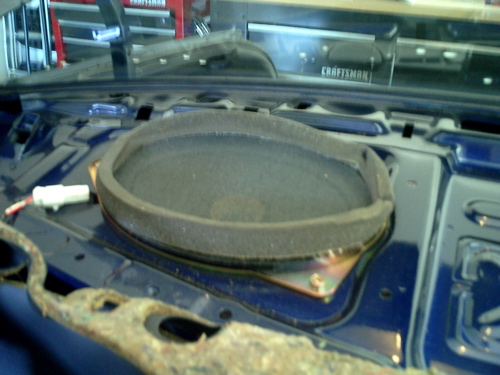
There's also a layer of carpet and vinyl padding on the rear deck. You don't have to remove this padding - just drape it forward to expose the speakers.
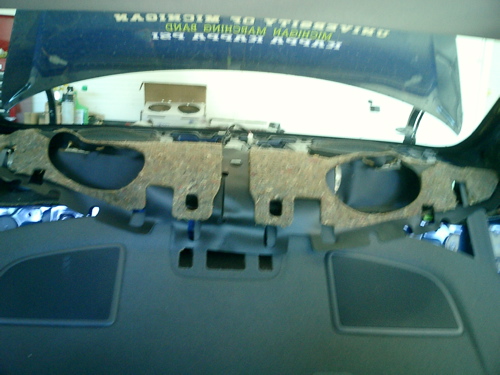
And voila! There's the rear speaker!
REAR SPEAKER MOUNTING BRACKET FABRICATION
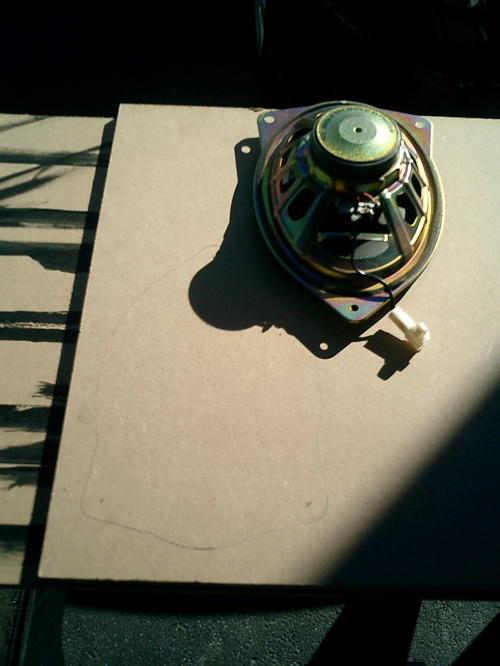
Now, my new rear speakers were 6" and wouldn't fit flush into the 6x9" hole for the old speakers, so I needed to fabricate a mounting bracket out of 1/2-inch thick MDF. This is available from any hardware store. If you can find thinner MDF, then by all means use it.
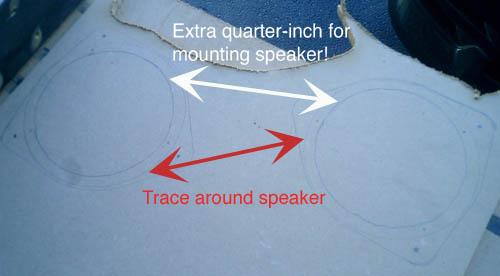
First I traced an outline of the old speakers (including the screw holes) onto the MDF.
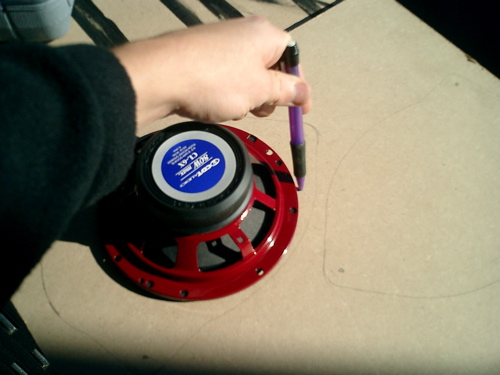
Then I traced the new speaker into the trace of the old speaker. I also made a line about 1/4-inch inside of this line - this is the line you cut along. Don't cut the trace line, or else you won't have any wood to mount the speaker to!!
I then used my very handy scroll saw to cut the outside...
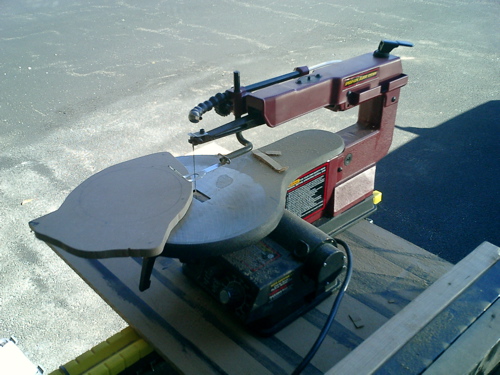
... and inside...
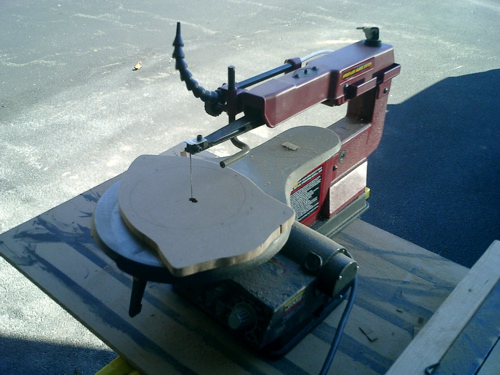
... of the brackets. You can use a Dremel or a jig saw to do these cuts, too. A scroll saw worked best for me, though. Once the cuts were made I drilled the mounting holes, sanded it down, and painted it with black spray paint.
FRONT DOOR REMOVAL
Removing the front door isn't too hard. First, lower your windows. Next, remove the black panel that hides the screws that hold the side view mirrors to the door (just pull and one snap will come loose).
Then proceed by removing the window controls (for power window/lock equipped Camrys). To do this, pry either a screw driver or interior trim tool under the back edge, push the tool to disengage the clip holding it in place, and lift.
Now start removing screws that hold the door in place. There are about 6 philips head screws in each door - One toward the front of the door (covered by a small button), two along the bottom edge of the door, two in the arm rest (one is behind a plug that required a screw driver or trim tool to remove, and one behind a small flap in the door handle (which also requires a screw driver to open).
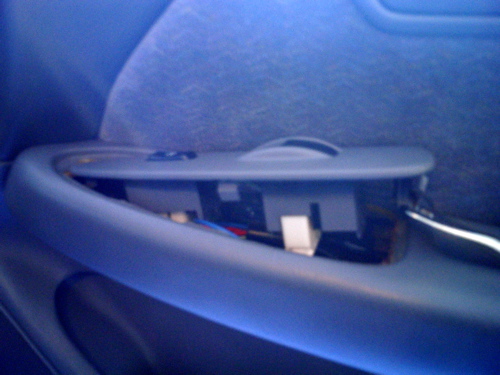
The hardest part to remove is the door handle trim. For this you'll need a screwdriver and a special touch. Using the picture below as a reference, insert the screwdriver where indicated and leverage the screwdriver so you're lifting the trim away from the door handle. It's not intuitive, but if you leverage it just right the trim will pop off and out easy as cake.

Now with all of the screws out, there are four snaps on the front and back edges of the door holding it in place. Use your trim tool or hands to pull the trim from the door. Now just lift the trim straight off the door...
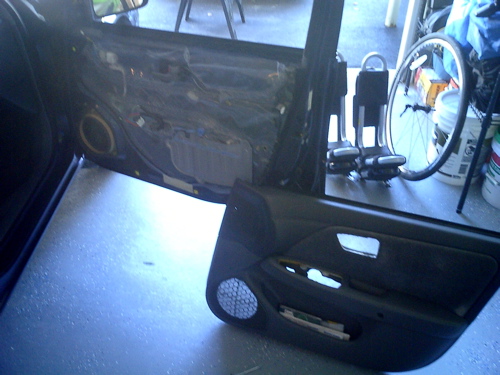
... and there's your speaker!
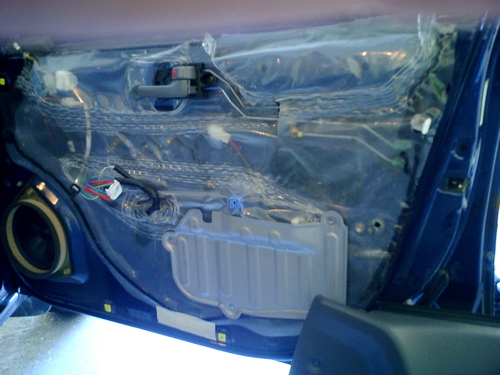
You'll need to pull back the plastic sheeting to access the speaker wires and wire connector. Some people decide to just pull all of it off and junk it, but if you're doing that it's probably best to replace it with some Dynamat or other sound proofing material.
FRONT SPEAKER BRACKET FABRICATION
So the front speaker bracket fab steps are identical to the rear fab steps. Just trace your old speakers and new speakers accordingly...
... and start cutting!

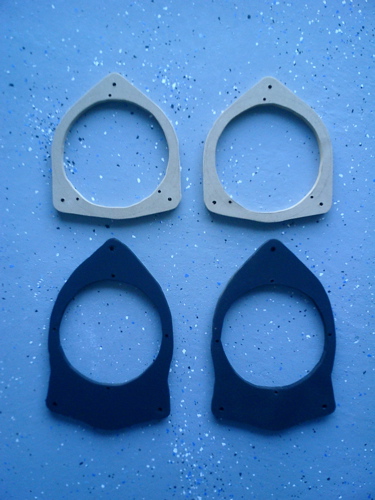
Here's a pic of the front and rear brackets together. They look like disfigured fish to me.
REAR SPEAKER INSTALL
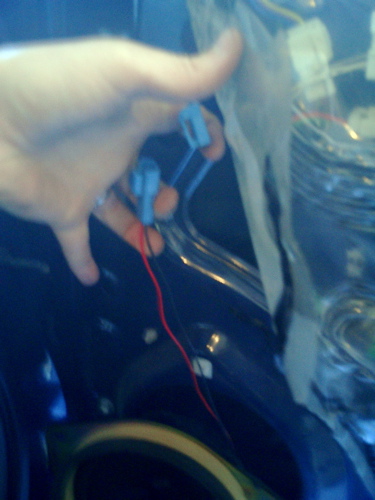
So the speakers I bought didn't have wires pre-soldered to them, so I had to borrow the old speaker wire and connectors and solder them on. Not a big deal. All you need is a soldering iron and electrical solder - both available at any hardware or craft store for cheap.
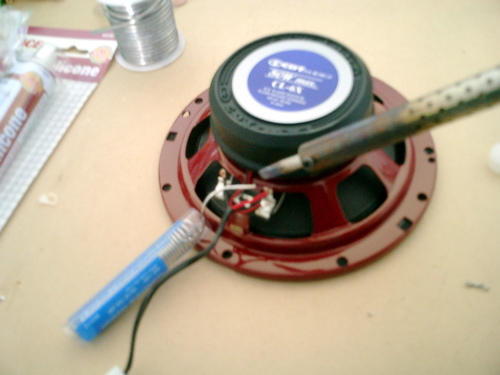
For mounting the speakers to the bracket, I used nuts/bolts as well as silicone adhesive. The silicone acts as a glue to make sure the speakers don't come loose and start rattling against the brackets.
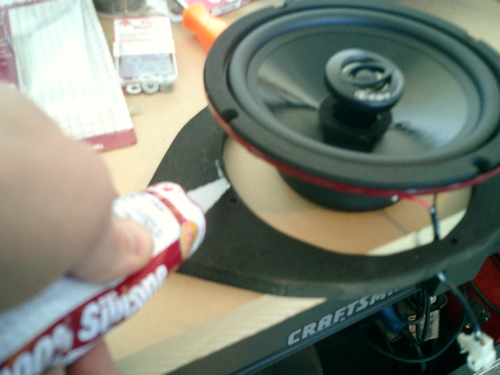
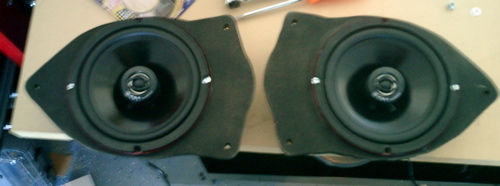
Here's a shot of the speakers installed in the brackets. Now they really look like fish!
All that's left now is to install the new speaker/bracket assembly into the car. Since the old body bolts were too short to secure the MDF, I was able to find longer body bolts at the local hardware store (10-24 x 1.5", I think).
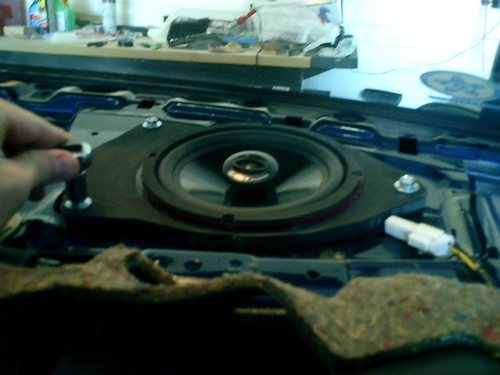
All that's left to do is reassemble the rear deck, brake lamp, trim and seats.
FRONT COMPONENT INSTALL
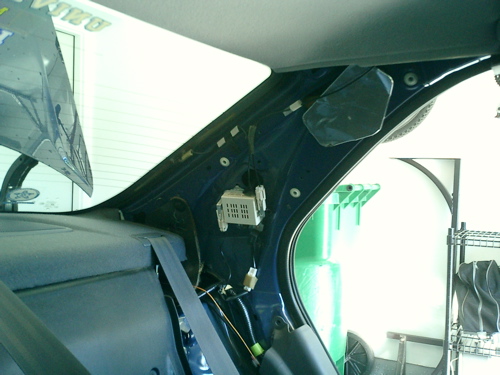
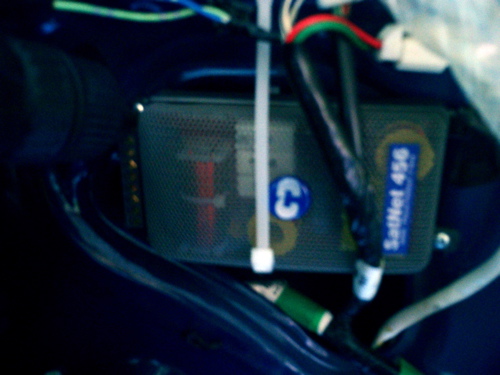
The front speakers were a little tricky for me, mainly because I had to also install the crossovers. Luckily, I was able to find a small open area behind a wire harness that was perfect. Mounting was made simple with a few self-drilling sheet metal screws, available at any hardware store. Zip ties also helped keep things secure, and made a good place to tuck excess wiring.
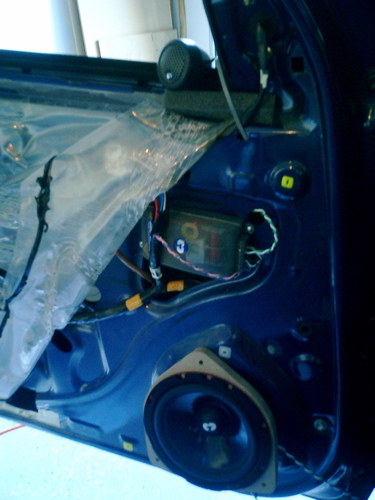
Here's a wider view of the speaker and crossover installation. The front speaker installation is similar to the rears, except I used 1.5-inch self-drilling sheet metal screws to secure the speakers to the door. Pre-drilled holes in the bracket acted as guides for the screws, and I made sure to add a bead of silicone around the whole thing before I put electric screwdriver to screw.
A quick note - I put in new 6.5" speakers that were too deep to mount directly to the sheet metal, since they would interfere with the windows (this is why you roll the windows down when removing the door trim). If my speakers were not too deep, I could have mounted them directly to the sheet metal. You'll have to make your own judgment call when installing your speakers.
I also decided to mount the tweeters as surface mount speakers. You can see the tweeter sitting on top of the door, not really mounted to anything. Once I put the door back on, I used double-sided foam tape (3M makes many kinds of this tape) to mount the tweeters to the black plate that covers the side view mirror screws. Other people will actually install the tweeters closer to the door speaker, or they'll even install it in the kick panels on the floor. This is a personal preference.
SUMMARY
Most of the installation was pretty intuitive and straight forward. The hardest parts were figuring out how to remove the rear deck and mounting the front speakers & crossovers. Other than that, as long as you have a little faith in yourself you should do just fine.
If you want more information, or need a little bit of advice, feel free to email me ---> puckstop at gmail dot com.
I can't promise I'll have all of the answers, but between you, me, the forums and Google, we should be able to figure something out.